接着上一篇http://xcoding.tech/2018/12/06/junit-jacoco/junit-jacoco%E4%BB%A3%E7%A0%81%E8%A6%86%E7%9B%96%E6%B5%8B%E8%AF%95/ 。
上一篇只是简单的java项目,实际应用通常会复杂很多,比如spring项目,那么本篇介绍如何在spring项目中做代码覆盖率扫描并生成报告。
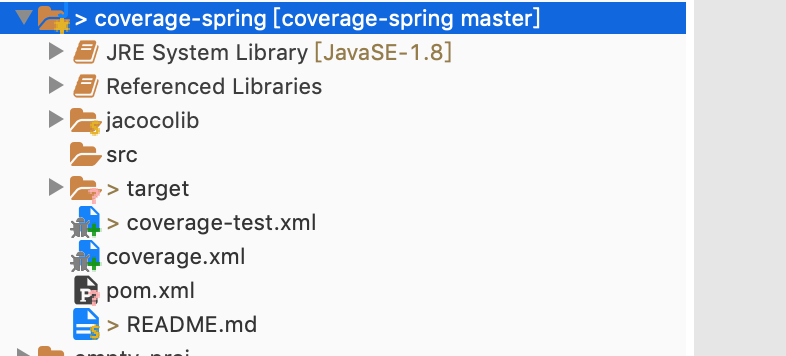
使用maven构建spring项目 清空原有目录 复制上一篇的项目,命名为coverage-spring,然后把目录下面src和test目录都删除了,里面的代码也不需要保留。删除之后项目目录结构如下:
另外,再把jacocolib目录下的hamcrest-core-1.3.jar、junit-4.12.jar也删除了,一会使用maven重新下载。
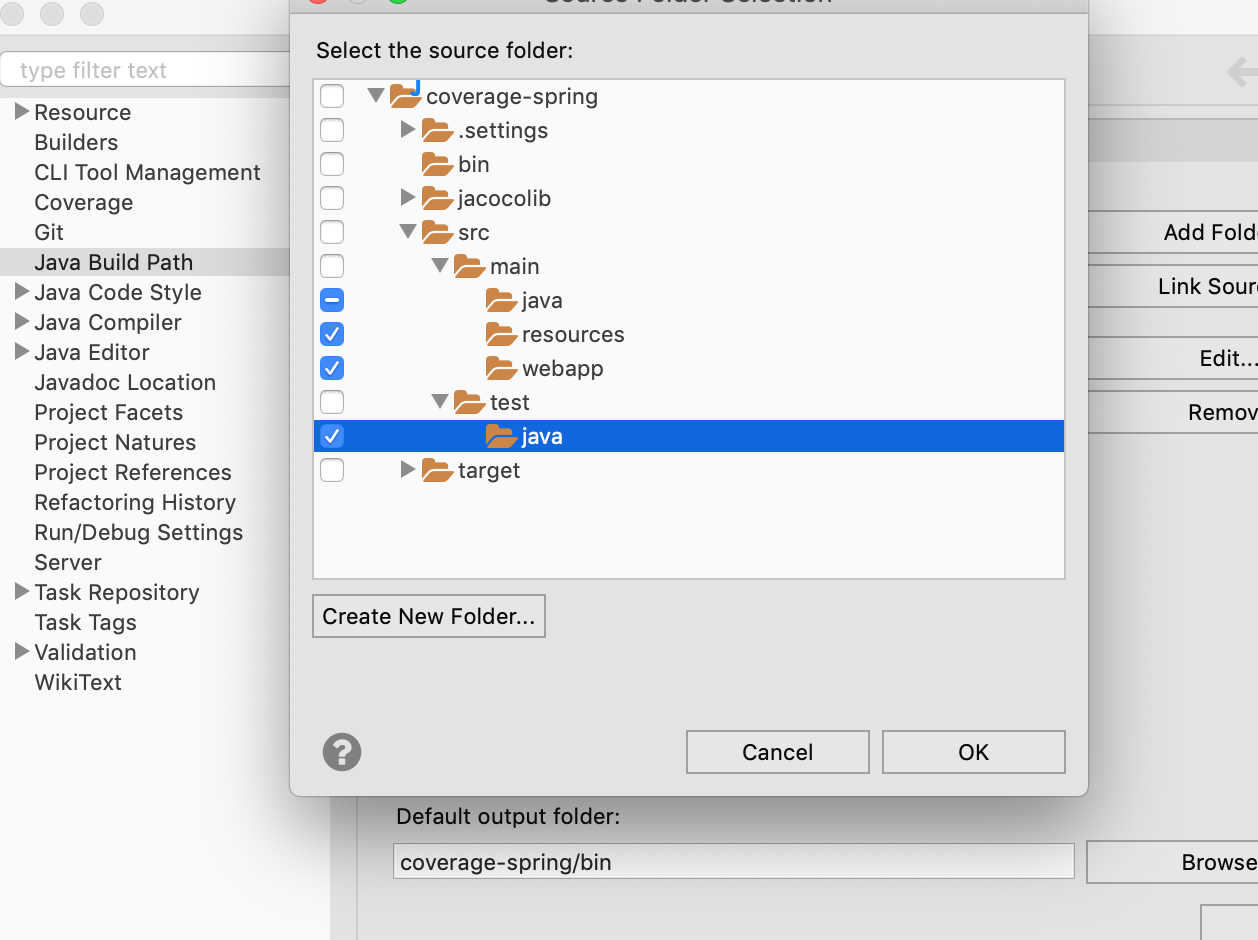
设置maven项目结构 修改项目结构,在项目属性的java build path里面设置,设置后结构如下截图:
注意 :对于没有的目录要自己创建(如截图左下角的create new folder),一级一级目录创建,创建完毕之后按截图勾选。
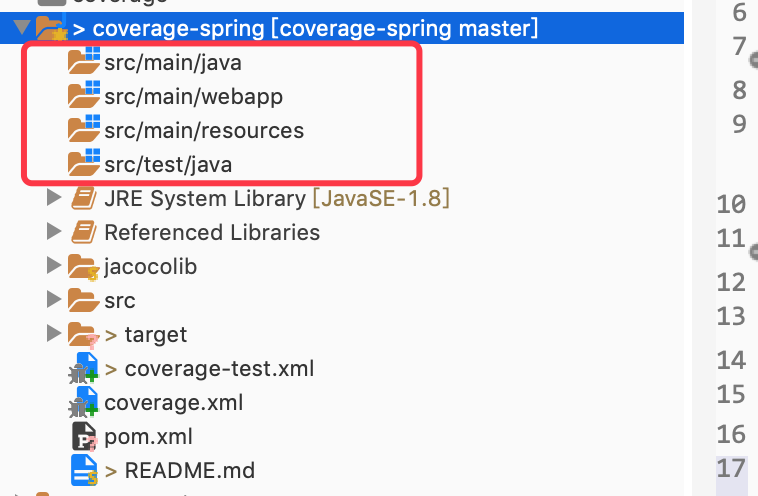
设置后目录结构如下:
1
2
3
4
5
6
7
8
9
10
//建立工程目录 src/main/java/com/ubuntuvim/coverage //建立test目录 src/test/java/com/ubuntuvim/coverage //建立resources文件夹 src/main/resources // 创建应用主配置 src/main/resources/application.xml //建立webapp目录 src/main/webapp/
文件具体内容本文后续逐个补充,创建的时候暂时为空文件。
增加pom.xml 项目结构创建完毕之后,在根目录下新增pom.xml,文件内容如下:
1 2 3 4 5 6 7 8 9 10 11 12 13 14 15 16 17 18 19 20 21 22 23 24 25 26 27 28 29 30 31 32 33 34 35 36 37 38 39 40 41 42 43 44 45 46 47 48 49 50 51 52 53 54 55 56 57 58 59 60 61 62 63 64 65 66 67 68 69 70 71 72 73 74 75 76 77 78 79 80 81 82 83 84 85 86 87 88 89 90 91 92 93 94 95 96 <project xmlns ="http://maven.apache.org/POM/4.0.0" xmlns:xsi ="http://www.w3.org/2001/XMLSchema-instance" xsi:schemaLocation ="http://maven.apache.org/POM/4.0.0 http://maven.apache.org/maven-v4_0_0.xsd" > <modelVersion > 4.0.0</modelVersion > <groupId > com.ubuntuvim.coverage</groupId > <artifactId > coverage-spring</artifactId > <packaging > jar</packaging > <version > 0.0.1-SNAPSHOT</version > <name > spring proj coverage test</name > <url > http://maven.apache.org</url > <properties > <project.build.sourceEncoding > UTF-8</project.build.sourceEncoding > <spring.version > 5.1.2.RELEASE</spring.version > <project.master.classpath.dir > master-lib</project.master.classpath.dir > </properties > <dependencies > <dependency > <groupId > org.springframework</groupId > <artifactId > spring-webmvc</artifactId > <version > ${spring.version}</version > </dependency > <dependency > <groupId > org.springframework</groupId > <artifactId > spring-core</artifactId > <version > ${spring.version}</version > </dependency > <dependency > <groupId > org.springframework</groupId > <artifactId > spring-context</artifactId > <version > ${spring.version}</version > </dependency > <dependency > <groupId > org.springframework</groupId > <artifactId > spring-beans</artifactId > <version > ${spring.version}</version > </dependency > <dependency > <groupId > org.springframework</groupId > <artifactId > spring-aop</artifactId > <version > ${spring.version}</version > </dependency > <dependency > <groupId > org.springframework</groupId > <artifactId > spring-test</artifactId > <version > ${spring.version}</version > </dependency > <dependency > <groupId > org.springframework</groupId > <artifactId > spring-expression</artifactId > <version > ${spring.version}</version > </dependency > <dependency > <groupId > junit</groupId > <artifactId > junit</artifactId > <version > 4.12</version > <scope > test</scope > </dependency > <dependency > <groupId > javax.servlet</groupId > <artifactId > servlet-api</artifactId > <version > 2.5</version > <scope > provided</scope > </dependency > </dependencies > <build > <plugins > <plugin > <groupId > org.apache.maven.plugins</groupId > <artifactId > maven-dependency-plugin</artifactId > <executions > <execution > <id > copy</id > <phase > package</phase > <goals > <goal > copy-dependencies</goal > </goals > <configuration > <outputDirectory > ${project.master.classpath.dir} </outputDirectory > </configuration > </execution > </executions > </plugin > </plugins > </build > </project >
安装maven依赖 创建好pom.xml之后,在这个文件上右键 Run As -> maven install。稍等片刻spring依赖自动下载到根目录下的master-lib目录中。把jar都下载都根目录的master-lib中是为了后续编译代码时候引用方便,通过pom.xml中的outputDirectory标签设置了jar的保存目录。
增加业务代码 所需jar包下载到master-lib之后就可以编写spring代码了。在此之前先把下载的jar全部添加到项目类路径。
spring配置 打开src/main/resources/application.xml增加如下内容:
1
2
3
4
5
6
7
8
9
10
11
12
13
14
15
16
17
18
19
20
21
22
23
24
25
<?xml version="1.0" encoding="UTF-8"?> <beans xmlns ="http://www.springframework.org/schema/beans" xmlns:xsi ="http://www.w3.org/2001/XMLSchema-instance" xmlns:jee ="http://www.springframework.org/schema/jee" xmlns:context ="http://www.springframework.org/schema/context" xmlns:p ="http://www.springframework.org/schema/p" xmlns:mvc ="http://www.springframework.org/schema/mvc" xmlns:util ="http://www.springframework.org/schema/util" xsi:schemaLocation ="http://www.springframework.org/schema/beans http://www.springframework.org/schema/beans/spring-beans-4.1.xsd http://www.springframework.org/schema/context http://www.springframework.org/schema/context/spring-context-4.0.xsd http://www.springframework.org/schema/jee http://www.springframework.org/schema/jee/spring-jee-4.1.xsd http://www.springframework.org/schema/mvc http://www.springframework.org/schema/mvc/spring-mvc-4.1.xsd http://www.springframework.org/schema/util http://www.springframework.org/schema/util/spring-util-4.1.xsd" > <context:annotation-config /> <context:component-scan base-package ="com.ubuntuvim.coverage" /> <mvc:annotation-driven /> </beans >
验证项目 配置都准备好之后先验证一下项目是否搭建成功了。创建一个service类,然后用Junit启动这个类,验证spring容器是否配置成功了。
1
2
3
4
5
6
7
8
9
10
11
12
13
14
15
16
17
18
19
20
21
22
package com.ubuntuvim.coverage.service.impl;import org.springframework.stereotype.Component;import com.ubuntuvim.coverage.domain.User;import com.ubuntuvim.coverage.service.IUserService;@Component public class UserServiceImpl implements IUserService @Override public User getUser (String id) User u = new User(); u.setAge(20 ); u.setId("123" ); u.setUsername("ubuntuvim" ); return u; } }
Spring Test配置 业务类创建完毕之后我们新建一个Junit类用于测试这个service类。在创建测试类之前先增加一些其他代码,用于加载配置,设置web环境等,后续所有的测试都需要继承这个基类。
创建BaseJunit4Test基类 该类主要用来加载配置文件,设置web环境。所有的测试类,都继承该类即可。
1
2
3
4
5
6
7
8
9
10
11
12
13
14
15
16
17
18
19
20
21
22
23
package com.ubuntuvim.coverage.base;import org.junit.runner.RunWith; import org.springframework.test.context.ContextConfiguration; import org.springframework.test.context.junit4.SpringJUnit4ClassRunner;import org.springframework.test.context.web.WebAppConfiguration; @RunWith(SpringJUnit4ClassRunner.class) @ContextConfiguration(locations={"classpath:application.xml"}) @WebAppConfiguration("src/main/webapp") public abstract class AbstractBaseJunit4Test }
业务代码测试类:
1
2
3
4
5
6
7
8
9
10
11
12
13
14
15
16
17
18
19
20
21
22
23
24
package com.ubuntuvim.coverage.service.impl;import static org.junit.Assert.assertNotNull;import org.junit.Test;import org.springframework.beans.factory.annotation.Autowired;import com.ubuntuvim.coverage.base.AbstractBaseJunit4Test;import com.ubuntuvim.coverage.domain.User;import com.ubuntuvim.coverage.service.IUserService;public class UserServiceImplTest extends AbstractBaseJunit4Test @Autowired private IUserService iUserService; @Test public void testGetUser () User u = iUserService.getUser("123" ); assertNotNull(u); } }
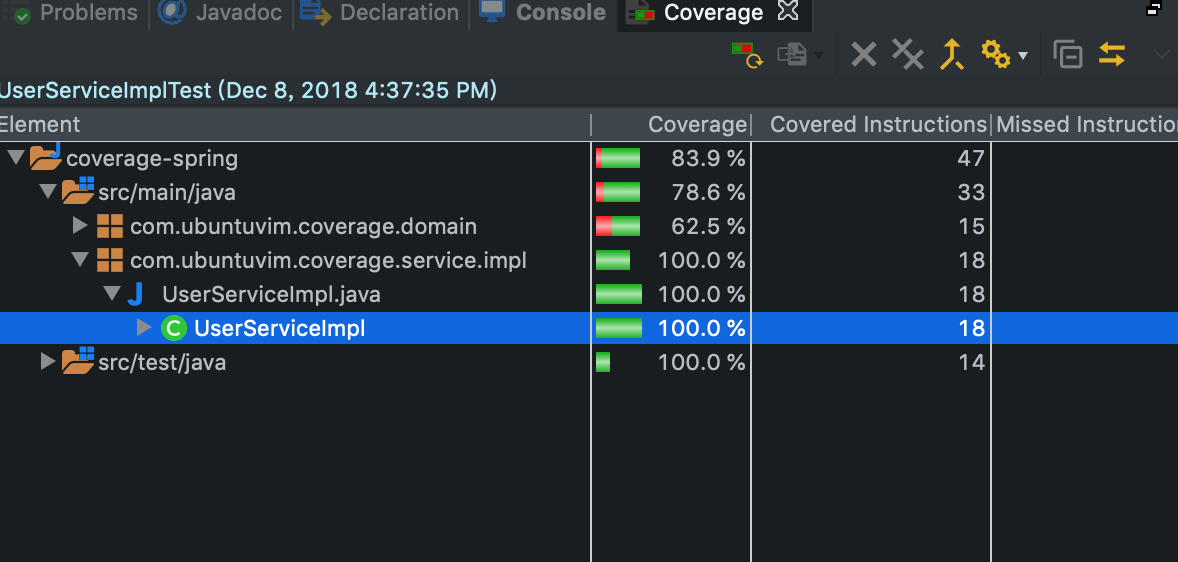
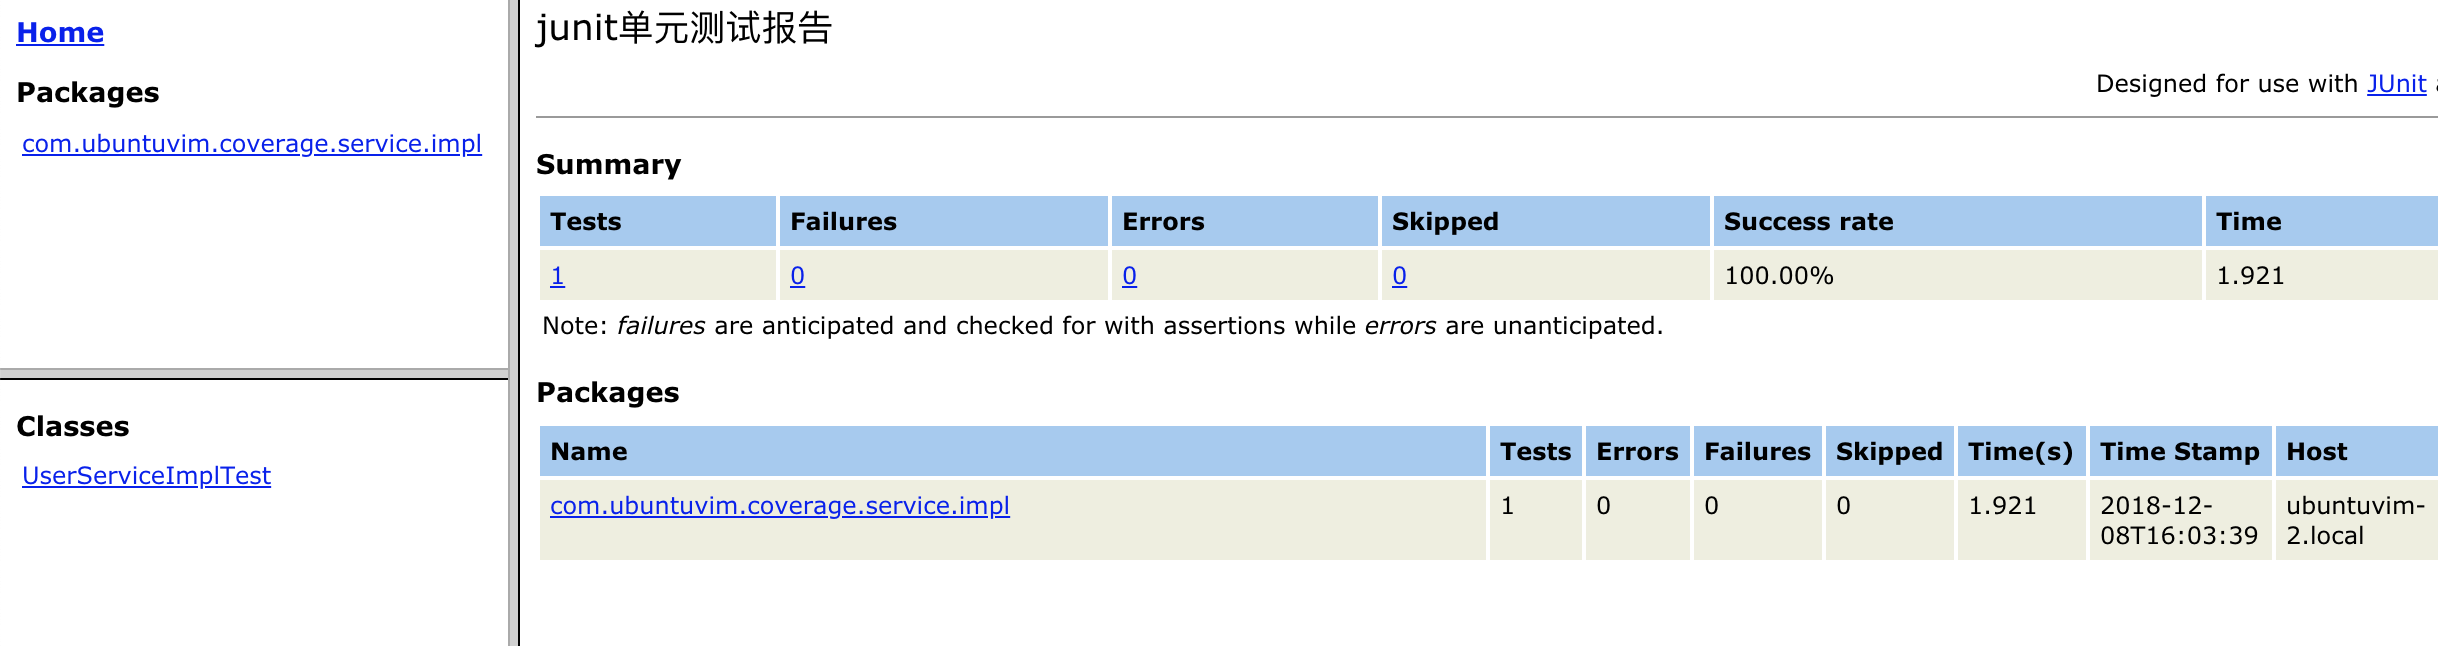
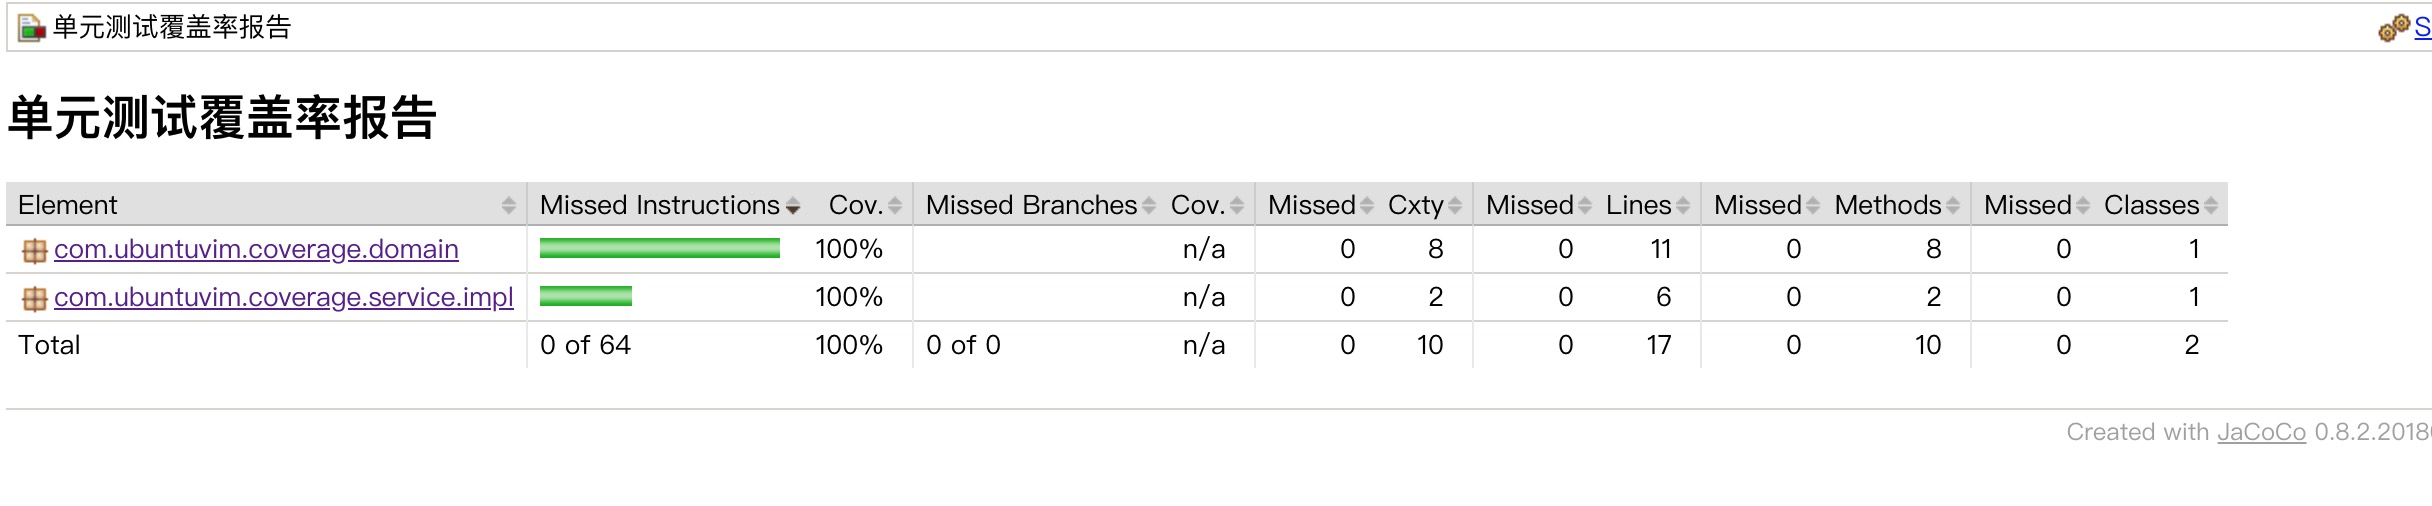
右键 -> Coverage As -> Junit Test。运行完毕之后可以看到覆盖率结果:
整合Ant自动扫描 到此为止,项目环境是验证通过了,直接使用覆盖率运行也是没问题的。那么下一步就是整合Ant,使用Ant脚本自动运行测试类并生成覆盖率报告。
复制第一篇创建的项目中的build.xml和build-test.xml。重命名为compile.xml和coverage-report.xml,你也可以不重命名,我只是为了用一个更直观的名字所以改一改文件名。
稍微调整一下buil.xml的内容,如下:
1
2
3
4
5
6
7
8
9
10
11
12
13
14
15
16
17
18
19
20
21
22
23
24
25
26
27
28
29
30
31
32
33
34
35
36
37
38
39
40
41
42
43
44
45
46
47
48
49
50
51
52
53
54
55
56
57
<?xml version="1.0" encoding="UTF-8"?> <project name ="AntTestReporting" basedir ="." default ="compile" > <property name ="DEBUG" value ="true" /> <property name ="VERBOSE" value ="true" /> <property name ="TARGET" value ="1.8" /> <property name ="build.dir" value ="build" /> <property name ="src.dir" value ="src/main/java" /> <property name ="src.classess.dir" value ="${build.dir}/classess" /> <property name ="test.dir" value ="src/test/java" /> <property name ="test.classess.dir" value ="${build.dir}/test-classess" /> <property name ="master-lib" value ="master-lib" /> <property name ="third-party-lib" value ="jacocolib" /> <path id ="classpath" > <fileset dir ="${master-lib}" > <include name ="**/*.jar" /> </fileset > <fileset dir ="${third-party-lib}" > <include name ="**/*.jar" /> </fileset > </path > <target name ="init" > <delete dir ="${build.dir}" /> <mkdir dir ="${build.dir}" /> <mkdir dir ="${src.classess.dir}" /> <mkdir dir ="${test.classess.dir}" /> </target > <target name ="compile" depends ="init" > <javac target ="${TARGET}" debug ="${DEBUG}" verbose ="${VERBOSE}" classpathref ="classpath" optimize ="true" destdir ="${src.classess.dir}" srcdir ="${src.dir}" > </javac > <echo > ======== java代码编译完毕 ========</echo > <path id ="classpath.src.dir" > <pathelement location ="${src.classess.dir}" /> </path > <javac target ="${TARGET}" debug ="${DEBUG}" verbose ="${VERBOSE}" optimize ="true" destdir ="${test.classess.dir}" srcdir ="${test.dir}" > <classpath refid ="classpath" /> <classpath refid ="classpath.src.dir" /> </javac > <echo > ======== test代码编译完毕 ========</echo > </target > </project >
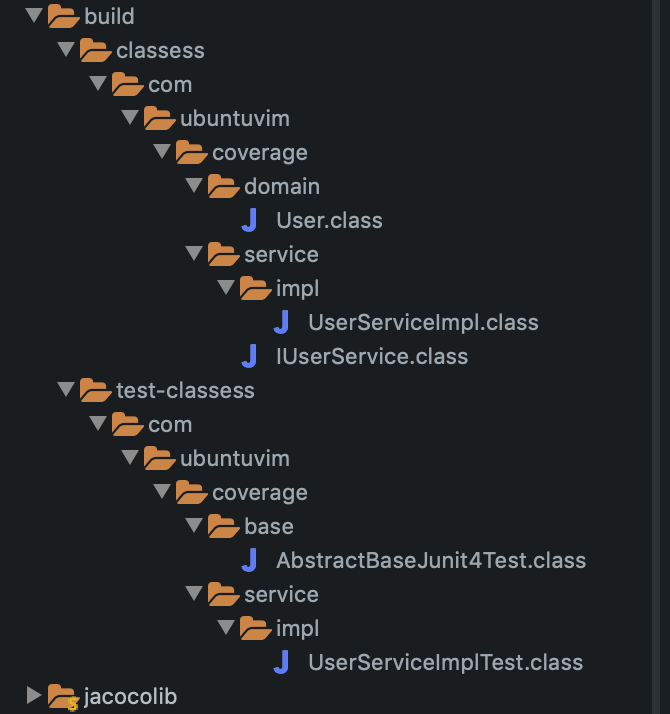
运行ant脚本之后,刷新项目可以看到多了一个build目录,在目录下可以看到所有编译后的class文件。
编译完成之后再使用Ant执行测试类代码,脚本仍然是在前一个项目基础上改造而得。
1
2
3
4
5
6
7
8
9
10
11
12
13
14
15
16
17
18
19
20
21
22
23
24
25
26
27
28
29
30
31
32
33
34
35
36
37
38
39
40
41
42
43
44
45
46
47
48
49
50
51
52
53
54
55
56
57
58
59
60
61
62
63
64
65
66
67
68
69
70
71
72
73
74
75
76
77
78
79
80
81
82
83
84
85
86
87
88
89
90
91
92
93
94
95
96
97
98
99
100
101
102
103
104
105
106
107
108
109
110
111
112
113
114
115
<?xml version="1.0" encoding="UTF-8"?> <project name ="AntTestReporting-test" basedir ="." default ="main" xmlns:jacoco ="antlib:org.jacoco.ant" > <import file ="compile.xml" /> <taskdef uri ="antlib:org.jacoco.ant" resource ="org/jacoco/ant/antlib.xml" > <classpath path ="jacocolib/jacocoant.jar" /> </taskdef > <property name ="spring.cfg.dir" value ="${basedir}/src/main/resources" /> <property name ="reports.dir" value ="${basedir}/reports" /> <property name ="test.data.dir" value ="${reports.dir}/testResults" /> <property name ="coverage.reports.dir" value ="${reports.dir}/coverage-report" /> <property name ="junit.reports.dir" value ="${reports.dir}/junit-report" /> <property name ="xms" value ="-Xms256m" /> <property name ="xmx" value ="-Xmx1024m" /> <path id ="classpath.test.dir" > <path refid ="classpath" /> <pathelement location ="${src.classess.dir}" /> <pathelement location ="${test.classess.dir}" /> </path > <target name ="init-report-dir" > <delete dir ="${test.data.dir}" /> <delete dir ="${coverage.reports.dir}" /> <delete dir ="${reports.dir}" /> <mkdir dir ="${reports.dir}" /> <mkdir dir ="${test.data.dir}" /> <mkdir dir ="${junit.reports.dir}" /> <mkdir dir ="${coverage.reports.dir}" /> </target > <target name ="copy-spring-cfg" description ="复制spring配置文件到test运行目录" > <echo > 复制spring配置到test运行目录</echo > <copy todir ="${test.classess.dir}" > <fileset dir ="${spring.cfg.dir}" > <include name ="**/*.xml" /> <include name ="**/*.properties" /> </fileset > </copy > </target > <target name ="run-test" depends ="init-report-dir, compile, copy-spring-cfg" > <echo > ========= 运行所有test类 =========</echo > <jacoco:coverage destfile ="${test.data.dir}/jacoco.exec" > <junit printsummary ="true" haltonfailure ="false" fork ="yes" forkmode ="once" showoutput ="yes> <jvmarg value=" ${xms }" /> <jvmarg value ="${xmx}" /> <classpath refid ="classpath.test.dir" /> <formatter type ="xml" /> <batchtest todir ="${test.data.dir}" > <fileset dir ="${test.classess.dir}" > <exclude name ="**/AbstractBaseJunit4Test.class" /> <exclude name ="**/*$*.class" /> <include name ="**/*Test.class" /> </fileset > </batchtest > </junit > </jacoco:coverage > <echo > ========= 生成Junit报告 =========</echo > <junitreport todir ="${test.data.dir}" description ="单元测试报告" > <fileset dir ="${test.data.dir}" > <include name ="TEST-*.xml" /> </fileset > <report format ="frames" todir ="${junit.reports.dir}" styledir ="${basedir}/junit-report-style" > <param name ="TITLE" expression ="junit单元测试报告" /> </report > </junitreport > <echo > ========= 生成覆盖率报告 =========</echo > <jacoco:report > <executiondata > <file file ="${test.data.dir}/jacoco.exec" /> </executiondata > <structure name ="单元测试覆盖率报告" > <classfiles > <fileset dir ="${src.classess.dir}" > <include name ="**/*.class" /> <exclude name ="**/AbstractBaseJunit4Test.class" /> <exclude name ="**/*$*.class" /> </fileset > </classfiles > </structure > <html destdir ="${coverage.reports.dir}" /> </jacoco:report > </target > <target name ="main" depends ="run-test" /> </project >
根据实际项目路径修改了一些相对路径,比较重要的有点是最好一个任务中把spring的测试基础类排除了。<exclude name="**/AbstractBaseJunit4Test.class" />。junitreport标签内增加了一个report标签,用于自定义生成的单元测试结果模板。
注意 :最好是打开junit标签中的属性showoutput="yes"(值为no或者yes),打开这个属性之后所有代码中的Logger日志才会打印到控制台,可以即时看到项目的实时日志方便调试。
打开这个开关之后可以看到有类似如下的日志:
1
2
3
4
5
6
7
8
9
10
11
12
run-test: [echo ] ========= 运行所有test 类 ========= [jacoco:coverage] Enhancing junit with coverage [junit] objc[21529]: Class JavaLaunchHelper is implemented in both /Library/Java/JavaVirtualMachines/jdk1.8.0_91.jdk/Contents/Home/jre/bin/java (0x10264b4c0) and /Library/Java/JavaVirtualMachines/jdk1.8.0_91.jdk/Contents/Home/jre/lib/libinstrument.dylib (0x1026c14e0). One of the two will be used. Which one is undefined. [junit] 十二月 09, 2018 12:57:26 上午 org.springframework.test.context.support.AbstractTestContextBootstrapper getDefaultTestExecutionListenerClassNames [junit] 信息: Loaded default TestExecutionListener class names from location [META-INF/spring.factories]: [org.springframework.test.context.web.ServletTestExecutionListener, org.springframework.test.context.support.DirtiesContextBeforeModesTestExecutionListener, org.springframework.test.context.support.DependencyInjectionTestExecutionListener, org.springframework.test.context.support.DirtiesContextTestExecutionListener, org.springframework.test.context.transaction.TransactionalTestExecutionListener, org.springframework.test.context.jdbc.SqlScriptsTestExecutionListener] [junit] 十二月 09, 2018 12:57:26 上午 org.springframework.test.context.support.AbstractTestContextBootstrapper getTestExecutionListeners [junit] 信息: Using TestExecutionListeners: [org.springframework.test.context.web.ServletTestExecutionListener@35e52059, org.springframework.test.context.support.DirtiesContextBeforeModesTestExecutionListener@62577d6, org.springframework.test.context.support.DependencyInjectionTestExecutionListener@49bd54f7, org.springframework.test.context.support.DirtiesContextTestExecutionListener@6b5f8707] [junit] Running com.ubuntuvim.coverage.service.impl.UserServiceImplTest [junit] 返回参数: = User [id=123, username=ubuntuvim, age=20] [junit] Tests run: 1, Failures: 0, Errors: 0, Skipped: 0, Time elapsed: 1.61 sec
重点是这几行日志:
1
2
3
4
………… [junit] 信息: Loaded default TestExecutionListener class names from location [META-INF/spring.factories]: ………… [junit] 返回参数: = User [id=123, username=ubuntuvim, age=20]
第一行是容器加载的日志,第二行是业务代码打印的Logger日志。
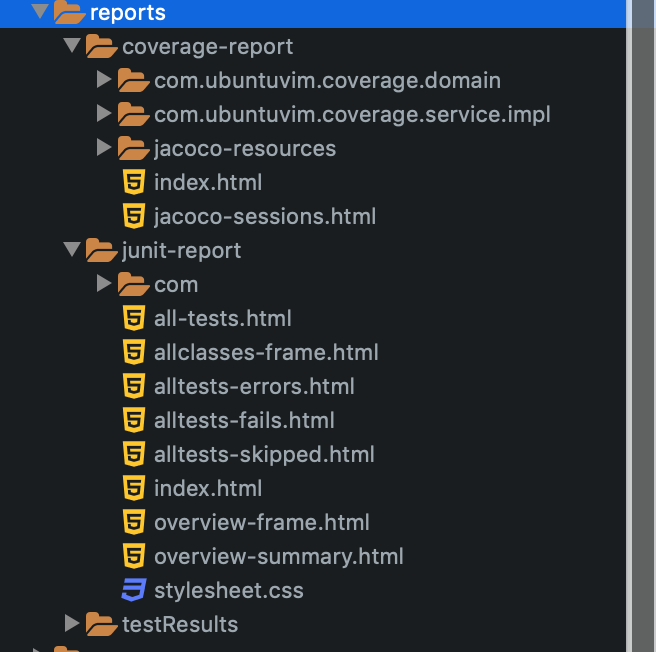
生成报告 按照上述内容配置好之后就可以直接运行了。在coverage-report.xml上右键,选中ant运行即可。运行完毕后项目目录下新增reports目录,目录内存放这Junit报告、覆盖率报告。
coverage-report和junit-report分别存放着覆盖率报告和单元测试报告,用浏览器直接打开这两个目录下index.html即可看到报告的详细信息。
项目源码 https://github.com/ubuntuvim/coverage/tree/coverage-spring